
This is a complete guide on how to correctly book levels taken using the height of collimation method. This is how all Site Engineers in the UK will record and work out their readings.
There are two common methods of booking levels used in surveying and construction. These are the height of collimation method and the rise and fall method. In this article I will guide you through how the height of collimation method is done, with the aid of a worked example.
Disclaimer: This site, and in particular this page, contains affiliate links to products. You are under no obligation to but if you visit and buy something from their site from a link on this site, we will receive a small commission, the price you pay will remain the same. This helps to keep this website running and your help is appreciated.
The height of collimation method is the more common of the two methods used on construction sites. This is my preferred method of booking levels when out on site. I find it easier and quicker than the rise and fall method.
For construction levelling we tend not to need the checks that the rise and fall method provides. Checks are still important, with the main one being to get a reduced level on a known point. As shown in this worked example.
Taking a reading on an E-Grad staff precisely and accurately is only the first part of completing a successful levelling run or traverse. It is important that your E-Grad staff readings are noted down accurately and in the correct format in a field book. This will enable you, and anyone else, to check your levelling work.
The Two Levelling Methods.
- The height of Collimation Method
- The Rise and Fall Method
The height of collimation method of booking levelling runs can also be known as the height of instrument method.
Terminology used in Levelling.
Both methods of booking the readings of a levelling run are the same.
That is, the first reading of any setup is a Back Sight and would be booked in the column labelled Back Sight.
The final reading taken on any setup is a Fore Sight and would be booked in the column labelled Fore Sight.
Any readings taken between the first and last readings on any setup would be an Intermediate Sight and would be booked in the column labelled Intermediate.
Before doing any levelling traverse it is best to do a two peg test first. There is a guide to doing a two peg test on this site.

To describe how the height of collimation booking is done I am going to use the example from the post How to carry out a levelling traverse or run. If you are not familiar with doing any levelling then I would recommend you read the article on how to carry out a levelling traverse before continuing with this height of collimation article.
Always complete the headings.
The first part of the booking process is to complete the heading of the page. It is important that the date is recorded (you may wish to record the time also). Record what the levelling run is for, in this case it is for Station Control. And record your starting position and where you intend to finish the levelling run. You should also have a good description of the reason and the points that need levelling.
In the picture below, you can see the information captured in the header of the page and we have the readings of the first leg of the levelling traverse. On starting the levelling traverse, we would note down the Reduced Level and the Station ID that we will start from.
In this example I have noted down the Reduced Level as 105.545 and in the Distance Column I have noted Datum A. (Depending on the information you need, you may insert the distance read to the staff in this column, but I use the remarks column for further information like working out top of kerb levels.)
The first setup of the Automatic (Dumpy) Level.
The first reading taken is our Back Sight, this is 2.596m (2596mm), and is noted in the Back Sight column of the book. Notice that I do not record a dot to separate the metre distance reading, I record the reading in millimetres as this saves time and confusion when measuring less than 1m on the E-Grad Staff.
The second reading taken is 2489mm and is on an Intermediate Sight (point B) and is noted in the Intermediate Column and B is noted in the Distance Column. The third reading taken is 1958mm and is on an Intermediate Sight (point C) and is noted in the Intermediate Column and C is noted in the Distance Column.
The fourth (and last taken on this setup) reading is 3045mm and is on a Fore Sight (point D) and is noted in the Fore Sight Column and D is noted in the Distance Column.

At this point I have just noted down the readings taken for the Back, Intermediate and the Fore Sights. This is the first setup of the automatic (Dumpy) Level.
The second setup of the automatic (Dumpy) Level.
Moving the automatic (Dumpy) Level to the next setup, the first reading is a Back Sight to Point D. The reading of 1157mm is noted in the Back Sight Column. Note, that this is done on the same line as the Fore Sight Reading taken in the previous setup.
The second reading on this setup is the last one to be taken, so is a Fore Sight and the reading of 865mm is entered is entered in the Fore Sight Column and E is entered in the Distance Column, as we are reading Point E.

Note that again all I have done so far is noted down the staff readings. I have yet to work out any collimation or reduced levels.
The third setup of the automatic (Dumpy) Level.
We now move the Automatic (Dumpy) Level to our last setup for this levelling run. Our first reading to Point E of 3754mm is recorded in the Back Sight Column on the same line as the Fore Sight reading taken in the previous setup.
The next reading is Point F, which is an intermediate reading of 2452mm and this is noted in the Intermediate Column and F is entered into the Distance Column.
The last reading for this levelling traverse is on Datum B which is 1965mm and is noted down in the Fore Sight Column and Datum B is recorded in the Distance Column.

This is all the readings we take for this levelling traverse, and we can now work out the collimation and reduced levels for this run. This is the completion of the site work, the calculations can be done back at the office.
Working out the Collimation and Reduced Levels for the levelling traverse.
The first calculation we do, works out the height of collimation of the auto level, that is the height that you are viewing when you look through the instrument at the staff. This is done by adding the Back Sight reading to the reduced level of the point that the E-Grad Staff is being held on.
B.S. + R.L = Height of Collimation (Instrument Height)
In this example we have
2.596+105.545=108.141
and we write down the 108.141 in the Collimation column.
All Back Sight readings are added to the Reduced Level.
Now that we know the height of the automatic (Dumpy) level we can move onto calculating the reduced levels of the other points we have readings for.
The next calculation is for point B, and we need to take away the Intermediate sight from the Collimation.
HPC – Intermediate Sight = Reduced Level.
The calculation is
108.141-2.489=105.652
and this is written in the Reduced Level column.

We have a further two more calculations to do on this setup, we have one Intermediate Sight and one Fore Sight.
All Intermediate and Fore Sight readings are deducted from the Instrument Height of Collimation (or HPC).
The same method is used for these calculations, so we have
108.141-1.958=106.183
and this result is noted in the Reduced Level Column for Point C.
Then we have
HPC – Fore Sight = Reduced Level.
108.141-3.045=105.096
which is noted in the Reduced Level Column for Point D. This is the last point calculation for this current setup.

As we have moved the auto level, we need to calculate the height of collimation for it again.
This is done in the same way we did the very first calculation, in this case though we have
B.S. + R.L = Height of Collimation (Instrument Height)
1.157+105.096=106.253
and the result is noted in the height of collimation column. Remember that all back sight readings are added to reduced levels.
Notice how we have not started afresh but using the same line. This has two benefits, first it saves space in the book and second it shows that these readings are all part of the same levelling traverse.
It is also easy to see where we have different setups of the automatic (Dumpy) Level and how many setups we have used for the entire levelling traverse.

We now move onto the last reading of this setup which is the fore sight and calculate thus.
HPC – Fore Sight = Reduced Level.
106.253-0.865=105.388
and note the result in the reduced level column. Remember that Intermediate and Fore Sight readings are always deducted from the height of collimation (or HPC).

As we have moved the auto level again, we need to calculate the height of collimation for it again. This is again done in the same way we did the very first calculation, in this case though we have
B.S. + R.L = Height of Collimation (Instrument Height)
3.754+105.388=109.142
and the result is noted in the height of collimation column.

We have a further two more calculations to do on this setup, we have one Intermediate Sight and one Fore Sight.
The same method is used for these calculations, but this time we have
HPC – Intermediate Sight = Reduced Level.
109.142-2.452=106.690
and this result is noted in the Reduced Level Column for Point F and then we have
HPC – Fore Sight = Reduced Level.
109.142-1.965=107.177
which is noted in the Reduced Level Column for Datum B. This is the last point calculation for this levelling traverse.

At this point it would be best practice to compare our calculated level for Datum B with the known value for Datum B to ensure that the levelling traverse has been done successfully. In this example we can see that the closure error is zero millimetres.
If we didn’t know what the reduced level for Datum B was beforehand then we would need close the traverse by going back to Datum A.
Important Steps in Booking Height of Collimation Levels.
B.S. + R.L = Height of Collimation (Instrument Height)
HPC – Intermediate Sight = Reduced Level.
HPC – Fore Sight = Reduced Level.
What is the acceptable closure error for Levelling?
On construction sites, a 3mm closure error would be acceptable for any levelling traverse. With the modern automatic (Dumpy) levels any error greater than 3mm would need investigation into error sources.
Any closure error greater than 5mm will require a detailed investigation. This will include doing the level traverse again.
Start investigating any mathematical errors, the addition and subtraction of your collimations and reduced levels.
If this doesn’t highlight the error, then doing the traverse again would be needed. It would be prudent to check your automatic (Dumpy) level by doing a two peg test. This will prove the accuracy of the level over a distance of at least 30m.
Read this guide to doing a two peg test.
I have been doing this kind of Levelling for years and over that time I have picked up some tips for being able to check Automatic (Dumpy) Levels quickly. They are all laid out on this site on the page quick and easy checks on automatic (dumpy) levels.
What is the best book for height of collimation readings?
The best book for recording site levels is the weather resistant Chartwell Survey Book. These are the only books we find that are site tough. They will survive the wet conditions that inevitably you will come across whilst working outside. The pages are tough and can be written on in both pen and pencil, and the pages can be written on when wet although writing in pen does not always work.
They are produced in two variants for recording site level observations. These are called the Chartwell Survey Book 2426 for the Height of Collimation layout and the Chartwell Survey Book 2416 for the Rise and Fall layout. Other books and formats are available in the Chartwell all weather book range.
The book used in this example is the Chartwell 2426 Survey Book, these books are the all weather books used on nearly every construction site in the UK. Check out the latest prices for the Chartwell 2426 Height of Collimation books here.
Height of Collimation Spreadsheet.
If you want a spreadsheet that works out the collimations and reduced levels for your levelling traverse then there is this survey level book spreadsheet for free from the Lichfield Survey Supplies website.
What Automatic (Dumpy) level should I use for taking levels?
Go for the best Automatic (Dumpy) Level you can afford. If you are buying your first automatic (dumpy) level then one of these will serve you well. Read the article about the best dumpy levels here.
I use the Topcon AT-B3. This is more expensive but gives greater accuracy for levelling runs. The Topcon AT-B3 reviewed is still being used today and is still a good level after 10 years of use. It has been constantly checked and calibration certificates issued, yet it has not had to be adjusted.

Related Articles
The Best 5 Automatic (Dumpy) Levels for under £200
5 Ways to Achieve Accurate Levelling
The Purpose and Importance of Land Surveying
The Purpose and Importance of Levelling and the automatic (dumpy) level
Recommended Automatic Levels.
| Make | Model | Availability and price on Amazon |
| Leica | NA320 | Check Price |
| Leica | NA720 | Check Price |
| Topcon | AT-B4A | Check Lichfield Survey Supplies |
Don’t forget to check out the latest price and availability of the Chartwell Height of Collimation book as used in this example.

Leica NA324 Automatic Level
Built to last but at a price you can afford.
Any of the Leica NA300 series of automatic levels will serve you well. The accuracy you need and the durability you want.
24x magnification allows the easy reading of the E-Grad staff at any distance. From under 1m to over 30m from the instrument.
Stadia constant of 100 allows for easy distance calculations.
IP54 rating so the rain won't stop you from working.
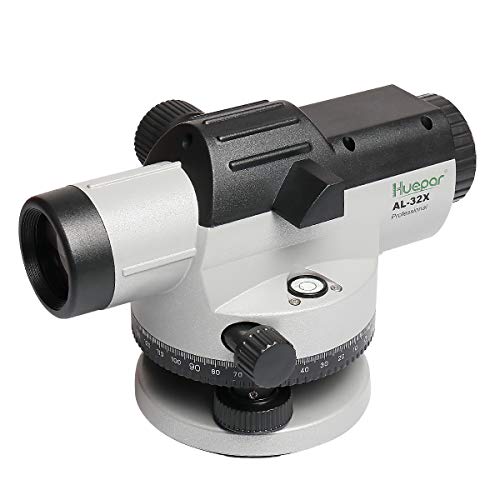
Huepar AL-32X Auto Level.
1.6mm Accuracy at 30m
32x magnification allows the easy reading of the E-Grad staff at any distance. From 1m to over 30m from the instrument.
Long Working range.
IP54 Rating for use outdoors no matter what the weather.
Stadia constant of 100 allows for easy distance calculations.

Bosch GOL-20D Auto Level.
IP54 Rating for use outdoors no matter what the weather.
Self-Locking Compensator for secure transportation.
20x magnification allows the easy reading of the E-Grad staff at any distance. From 1m to over 30m from the instrument.
Long 60m Working range.
Stadia constant of 100 allows for easy distance calculations.