
This article is about how to carry out a levelling traverse. I will be discussing the steps and techniques required to properly and accurately carry out a levelling traverse survey. Levelling traverse is a method of surveying that is used to determine the elevations of points along a specific path or route. This method is commonly used in construction, civil engineering, and land development projects. This is the method that I have been using for over 20 years on construction sites all over the UK. Hopefully, you will have a clear understanding of how to conduct a levelling traverse survey and the importance of accurate levelling in construction projects.
Why do we have a Levelling Procedure?
When we need to obtain absolute levels of points of interest we need to ensure that this is done as accurately and precisely as possible. For this reason, not only should we be using the best levelling equipment we can find, we also need to follow a defined survey levelling traverse procedure to obtain accurate results. It is very important that we use the correct method when carrying out a levelling traverse or run to eliminate any possible errors that can affect our accuracy and precision. To achieve this, we need to follow a levelling procedure.
Disclaimer: This site, and in particular this page, contains affiliate links to products. You are under no obligation to but if you visit and buy something from their site from a link on this site, we will receive a small commission, the price you pay will remain the same. This helps to keep this website running and your help is appreciated.
Check your auto or dumpy level before carrying out a levelling traverse.
Before doing any levelling traverse or run, a two peg test should be carried out on the auto or dumpy level that will be used. If the automatic (dumpy) level is not within the specified limits, then it will need to be calibrated prior to any precise levelling traverse being carried out. The automatic level should be sent to your local survey equipment specialist.
What is a levelling traverse?
The levelling traverse is a series of measurements taken that are taken in the field that may either start and finish at the same known point or start and finish in two different known points. This will ensure that we can determine the difference in levels of the points that we need to measure and that the levelling traverse has been completed to a satisfactory accuracy.
Common levelling procedure Terms.
| Term | Meaning |
| Back Sight | The first E-Grad Staff Reading taken. This measurement is used to work out the height of collimation of the Automatic (Dumpy) Level. |
| Intermediate Sight | Any E-Grad Staff reading taken after the Back Sight and before the Fore Sight. |
| Fore Sight | The last E-Grad Staff Reading taken. This measurement is used to work out the final reduced level of the current levelling setup. |
| Height Of Collimation | The absolute height of the survey instrument (line of sight). This will be calculated from the known Benchmark point with the measurement of the Back Sight added to it. |
| Change Point | A common point where a Fore Sight is taken, the auto dumpy level moved and then a Back Sight is taken. |
| Reduced Level | The vertical difference between the calculated height of collimation and the surveyed point of interest. |
| Benchmark | Point of known level or datum, usually related to the mean sea level. |

The Levelling Procedure for the Traverse.
- Setup the tripod at Setup 1 Location and secure by treading the legs into the ground. Adjust the legs of the tripod to roughly level the top of the tripod.
- Place and screw on the Auto or Dumpy Level to the tripod and level up using the foot screws. By putting the Auto Level on the tripod after, you prevent any shocks being transferred into the compensator mechanism of the Auto Level. This will help maintain accuracy of the Auto Level.
- With your Chainman holding the E-Grad Staff, using a spirit level bubble to hold the staff plumb, carefully read from the staff your 1st reading which will be (2.596m) your Back Sight. If you don’t have a spirit level bubble your chainman can always rock the staff back and forth and you can read the lowest value on the staff, this would be the position where the staff is plumb.
- Your chainman will then move to point B where you would aim and focus on the E-Grad staff and take your 2nd reading, with your chainman holding the staff correctly as detailed above. This would be an Intermediate Sight reading.
- Your chainman will then move to point C where you would aim and focus on the E-Grad staff and take your 3rd reading, with your chainman holding the staff correctly as detailed above. This would again be an Intermediate Sight reading. You may have further Intermediate Sight readings to do but, in this example, there is only two.
- Your chainman would then move to point D. As this is a change point (after this reading you will be moving the Auto Level) the E-Grad staff should be held on a solid point or a levelling change plate. Again, you would aim and focus on the E-Grad staff, with your chainman holding the staff correctly as detailed above. This would be your Fore Sight, this is the last reading taken with the Auto Level in its current position.
- With your chainman staying at point D, pack up the Auto Level to move to the next suitable setup location. It is not advisable to leave the Auto Level on the tripod whilst moving positions as the auto level could be easily damaged if dropped or you trip.
- Setup in the 2nd position following the same procedure as described in points 1 and 2 above. Aim and focus on the E-Grad staff (still on point D) and with your chainman holding it correctly take your 1st reading from this setup. This would be your Back Sight.
- Your chainman then needs to move to point E. As this is again a change point (after this reading you will be moving the Auto Level) the E-Grad staff should be held on a solid point or a levelling change plate. Again, you would aim and focus on the E-Grad staff, with your chainman holding the staff correctly as detailed above. This would be your Fore Sight, this is the last reading taken with the Auto Level in its current position.
- With your chainman staying at point E, pack up the Auto Level to move to the next suitable setup location.
- Setup in the 3rd position following the same procedure as described in points 1 and 2 above. Aim and focus on the E-Grad staff (still on point D) and with your chainman holding it correctly take your 1st reading from this setup. This would be your Back Sight.
- Your chainman will then move to point F where you would aim and focus on the E-Grad staff and take your 2nd reading of this setup, with your chainman holding the staff correctly as detailed above. This would be an Intermediate Sight reading.
- Your chainman then needs to move to point G. As this is the last the E-Grad staff should be held on a known point. Again, you would aim and focus on the E-Grad staff, with your chainman holding the staff correctly as detailed above. This would be your Fore Sight, this is the last reading taken with the Auto Level. It is important to finish on a known point to know the accuracy of your levelling run.
How to Record the Levels taken during the Levelling Procedure.
There are two main methods for recording the levels taken during the levelling procedure and both of the methods are covered in separate articles on this site. The two methods are:-
The Height of Collimation Method.
For general construction levelling, the engineer or surveyor would be confident they had done the levelling run correctly if they had ended up within 3mm of the last known point to be levelled.
For monitoring levelling, the engineer or surveyor would be confident they had done the leveling run correctly if they had ended up within 1mm or less of the last known point to be leveled. The greater the precision of the levelling run the greater the skill of the levelling team would need to be, they would also require more precise equipment, for example a good quality digital level.
Related Articles
Methods for Booking a Levelling Run. The Height of Collimation Method
Methods for Booking a Levelling Run. The Rise and Fall Method.

Leica NA324 Automatic Level
Built to last but at a price you can afford.
Any of the Leica NA300 series of automatic levels will serve you well. The accuracy you need and the durability you want.
24x magnification allows the easy reading of the E-Grad staff at any distance. From under 1m to over 30m from the instrument.
Stadia constant of 100 allows for easy distance calculations.
IP54 rating so the rain won't stop you from working.

Bosch GOL-20D Auto Level.
IP54 Rating for use outdoors no matter what the weather.
Self-Locking Compensator for secure transportation.
20x magnification allows the easy reading of the E-Grad staff at any distance. From 1m to over 30m from the instrument.
Long 60m Working range.
Stadia constant of 100 allows for easy distance calculations.
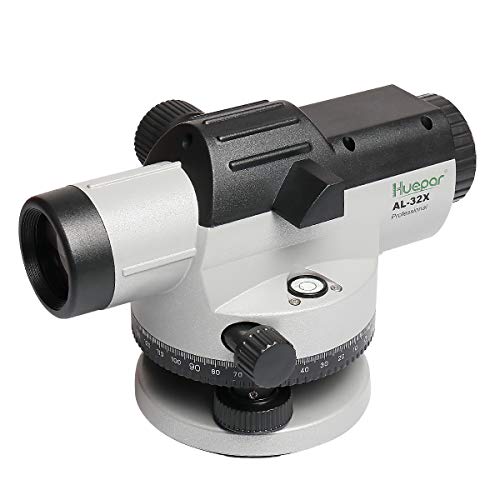
Huepar AL-32X Auto Level.
1.6mm Accuracy at 30m
32x magnification allows the easy reading of the E-Grad staff at any distance. From 1m to over 30m from the instrument.
Long Working range.
IP54 Rating for use outdoors no matter what the weather.
Stadia constant of 100 allows for easy distance calculations.